How to Replace or Update Graphics on an Existing Shell Scheme Stand
Updating an exhibition stand does not always mean starting again from scratch. You may want to refresh a promotion, correct outdated information or bring the display in line with a new brand design. Before ordering replacement graphics, check how the existing stand is built and how its panels fit. Small differences in dimensions or layout can affect alignment across a wall, while the choice of material affects handling and storage. A careful review of the stand, artwork and installation method can help make the update fit smoothly into your event plans.
Begin with the stand you already have
First, identify the shell scheme system and the configuration of your stand. Note whether it has a single back wall, an L-shaped corner or a U-shaped layout. Check which panels sit between the frame poles and whether any existing graphics cover the poles for a continuous finish.

Measure each section you plan to update. The supplied product page lists typical infill panels at 950 mm × 2,400 mm and seamless panels at 1,000 mm × 2,400 mm, but also says system specifications can differ. Use the organiser’s stand specification sheet where available, and confirm measurements before sending artwork to print.
Make a simple panel map showing the position, size and content of each piece. This helps you decide whether to replace one section or refresh the whole display. It also gives the printer a clearer picture of how the artwork needs to line up.
Decide what needs changing
Review the current display from a visitor’s point of view. Is the main message still accurate? Are the contact details, product images and branding current? Does the design still make sense when viewed across the whole stand?
You may only need to replace a panel with outdated information. If the colour palette or campaign has changed across the whole display, updating connected sections together may create a more consistent result. Avoid changing one panel in a way that leaves a noticeable mismatch with the rest.
Plan the information hierarchy before revising the artwork. Give the main message space, keep supporting copy concise and use images that remain clear at the size they will be printed. If the graphic runs across several sections, mark where text and important visual details should sit in relation to the joins and poles.
Match the new artwork to the panel layout
Ask whether your replacement will be an infill panel that sits between the frame poles or part of a seamless layout that covers them. The supplied product information describes both options. Infill panels leave the stand structure visible between sections; seamless graphics can create a more continuous-looking backdrop.
For a multi-panel design, prepare the artwork as one coordinated layout and confirm how it will be split for production. Check that lettering, logos and key parts of images do not fall across a join. A proof showing the full stand arrangement can make it easier to spot alignment issues before printing.
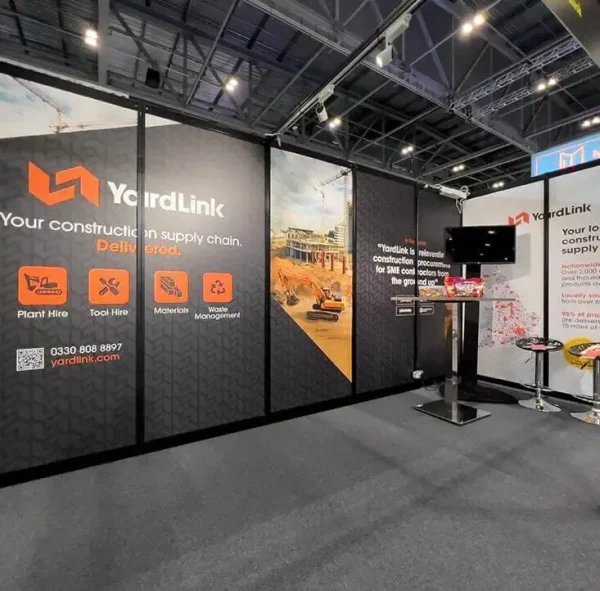
When updating shell scheme graphics, use the existing stand plan as a guide, but verify the measurements rather than assuming the old panels match the current system. The exhibition printing page says templates can be provided for specific shell scheme panels and that artwork files can be checked for resolution and bleed. Ask the supplier what file format and template they need for your order.
Choose a material and finish for the job
The supplied pages list rigid Foamex panels, rollable PVC and fabric as possible formats for shell scheme displays. Rigid panels provide a flat surface; rollable PVC is designed to be easier to transport in a tube; fabric is described as a lightweight option for tension displays. Choose based on the stand, how you will move the graphics and how they will be stored after the event.
Finishes also affect the display. The product page lists matt and gloss lamination, with anti-scratch as an available option. Matt may help reduce glare from exhibition lighting, while gloss gives a brighter appearance. Confirm which finishes are available for the material you select and whether the option suits your display conditions.
If you expect to reuse the panels, plan how they will be removed and stored after the show. The supplier recommends storing rigid panels flat and rollable graphics in their tubes. Take this into account before choosing a format, especially if storage space or transport is limited.
Keep installation straightforward
Check how the existing graphics are attached before ordering replacements. The product page describes heavy-duty Velcro or magnetic tape as possible fixing methods for certain shell scheme panels. Confirm which method is compatible with your stand and venue. Do not assume a fixing used for the old display will suit a different panel material or layout.
If you are replacing only one section, check the new panel against the existing ones before installation. Compare its size, finish and colour under the venue lighting. Keep the panels in their planned order and follow the supplier’s installation guidance to avoid unnecessary handling.
For updated shell scheme graphics, schedule time to review the proof and check the finished panels before the event. The exhibition printing page says turnaround depends on the order and distinguishes processing from delivery. Confirm current production and delivery timings directly with the supplier, leaving enough time to resolve artwork or fitting questions.
Make the update part of a wider refresh
A new backdrop can support more than a change of wording. Updated product images, a clearer brand message or a more consistent colour scheme can help the stand feel current. Keep the display focused on what visitors need to understand, and make sure printed graphics work with any screens, samples or other materials on the stand.
For wider event planning, see ways to strengthen your exhibition presence. The supplied Medium page could not be accessed during research, so this bold contextual link uses a shortened anchor based on its title.
When planning exhibition Printing, treat the stand measurements, artwork and installation details as one project. A file that looks right on screen may need adjustments to fit the actual panel layout. Review the proof at full size where possible, and make sure all changes are approved before production.
Conclusion
Replacing display graphics can be a focused update or a chance to refresh the whole stand. Start with verified measurements and the organiser’s layout, then decide which panels need new artwork, how the design will cross joins and which material and finish suit your plans. Check the proof, fixing method and delivery schedule before the event. Foamex Printing Company’s product information describes panel types, finishes and artwork support; confirm the details for your specific stand before placing an order.


Comments
Post a Comment